Phone as Trackpad for your Computer
import pyautoguifrom flask import Flask, render_templateapp = Flask(__name__)# Apparently flask doesn't support negative numbers. So offsetting it.coordinateShifter = 1000@app.route('/')def index():f = open("index.html", "r")return f.read()@app.route('/move/<int:x>/<int:y>')def move(x, y):pyautogui.move(x - coordinateShifter, y - coordinateShifter)return 'moving'@app.route('/click')def click():pyautogui.click()return 'clicking'
export FLASK_APP=server.pyflask run -h <your_ip_address>
http://<your_ip_address>:5000/move/200/100http://<your_ip_address>:5000/click
<div id="fullscreen"></div>
#fullscreen {background-color: #cccccc;text-align: center;position: absolute;top: 0;left: 0;right: 0;bottom: 0;}
The JavaScript logic would be as follows:
// Apparently flask doesn't support negative numbers. So offsetting it.
const coordinateShifter = 1000;
const elem = document.getElementById("fullscreen");
var prevX, prevY;
elem.addEventListener('mousedown', function (e) {
console.log('click');
var url = window.location.href + 'click';
var xmlHttp = new XMLHttpRequest();
xmlHttp.open("GET", url, false);
xmlHttp.send(null);
}, false);
elem.addEventListener('touchstart', function (e) {
e = e.originalEvent || e;
e.stopPropagation();
}, false);
elem.addEventListener('touchmove', function (e) {
e.preventDefault();
if (e.targetTouches.length === 1) {
console.log('move');
if (typeof prevX === 'undefined') {
prevX = e.targetTouches[0].pageX;
prevY = e.targetTouches[0].pageY;
} else {
var diffX = e.targetTouches[0].pageX - prevX;
var diffY = e.targetTouches[0].pageY - prevY;
prevX = e.targetTouches[0].pageX;
prevY = e.targetTouches[0].pageY;
var url = window.location.href + 'move/' + parseInt(coordinateShifter + diffX) + '/' + parseInt(coordinateShifter + diffY);
var xmlHttp = new XMLHttpRequest();
xmlHttp.open("GET", url, false);
xmlHttp.send(null);
}
}
e.stopPropagation();
}, false);
elem.addEventListener('touchend', function (e) {
console.log('move-done');
prevX = undefined;
prevY = undefined;
}, false);
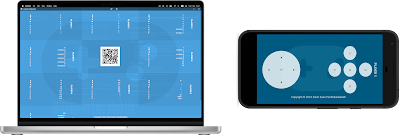
Open up the web app on your phone using the URL http://<your_ip_address>:5000 and start controlling your mouse. You can observe that the controls are not very smooth, but neverthless, it works. The following is a video recording wherein I try to control the mouse using my phone. I did not have another camera to take the entire video, therefore I am just sharing the screencast. Note that only cursor movement and clicking have been implemented. You could also attempt to create a click and drag mechanism or multitouch scrolling as well.
Let me also attach the screenshot of the web app. Plain and simple, huh? If you are worried about the battery consumption, feel free to change the colout to black.

I hope this was inspiring. Feel free to modify the code and create something awesome.


Comments
Post a Comment